Blender → Substance Painter → Blender: A Clean PBR Export Workflow (No Washed-Out Colors)
The real reason your Painter textures look “wrong” in Blender
Substance Painter is extremely consistent in how it previews materials. Blender is also consistent, but only if your color management and shader setup match the assumptions of PBR.
When things break, it’s usually one of these:
- Base Color is being interpreted incorrectly (color space issue)
- Roughness/Metallic maps are being treated as color data
- Normal maps are flipped or not set to “Non-Color”
- You exported the wrong preset from Painter
- Your Blender lighting is wildly different from Painter’s HDRI preview
The good news is: once you set up a clean workflow, you can reuse it forever.
What this workflow covers (and who it’s for)
This guide is for:
- Blender users doing product visualization
- Hard-surface artists using Painter for smart materials
- Anyone exporting PBR textures and wanting the Blender render to match Painter
We’ll cover:
- the clean export settings in Substance Painter
- the correct Blender shader hookup
- color management gotchas that cause “washed-out” materials
- a checklist for troubleshooting
Step-by-step: Blender → Painter → Blender (clean workflow)
Step 1: Prepare your Blender mesh properly (before export)
Substance Painter is picky about mesh consistency. Blender can be forgiving. That mismatch causes issues later.
Before exporting from Blender:
Checklist
- Apply scale: Ctrl + A → Scale
- Apply rotation: Ctrl + A → Rotation
- Make sure the model is at real-world scale (meters or centimeters)
- Make sure normals are correct (Face Orientation overlay helps)
- Use clean UVs (no overlapping unless intentional)
- Keep UV islands inside 0–1 unless you’re intentionally using UDIMs
Recommended export format
- FBX for the most common workflow
- OBJ works too, but FBX tends to preserve smoothing better
Export tips
- Use triangulation only if your mesh will be used in game engines
- For product viz, keep quads, but make sure shading is clean
Step 2: Export from Blender with reliable settings (FBX)
In Blender, export using:
- File → Export → FBX
- Apply Transform: ON
- Forward: -Z Forward
- Up: Y Up
- Apply Scalings: FBX Units Scale
- Smoothing: Face
Why this matters: Painter relies heavily on the mesh’s shading and tangents. Bad smoothing = weird normal map behavior.

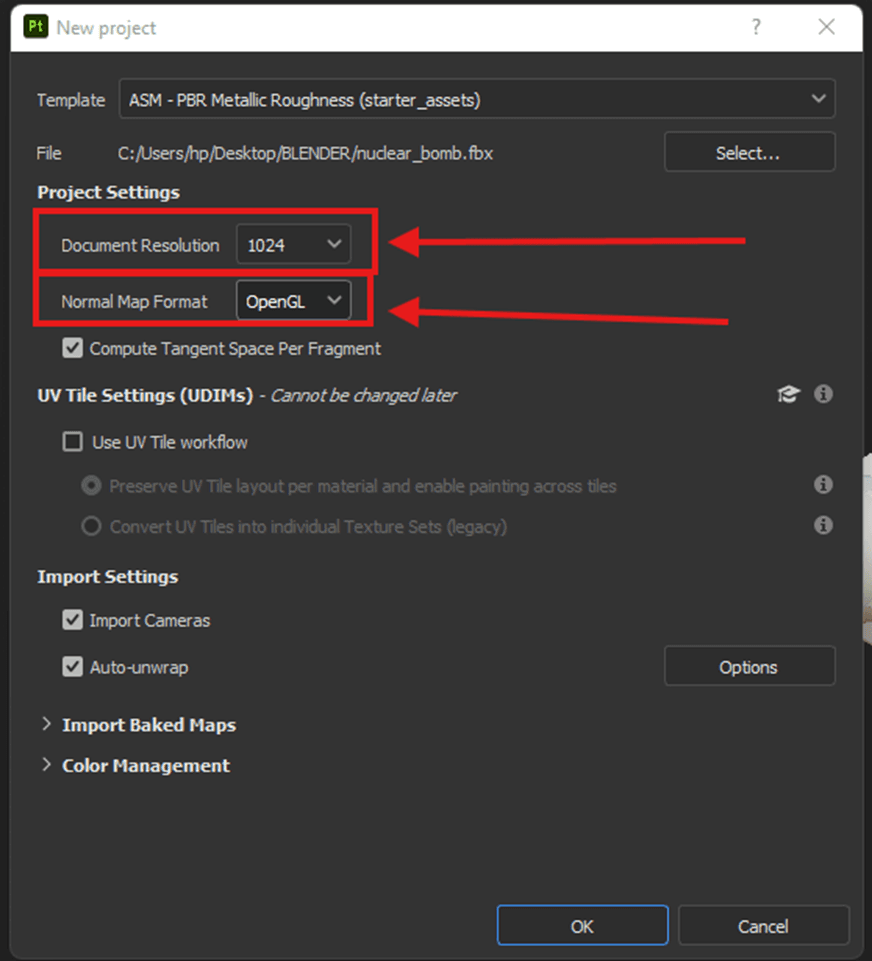
Step 3: Set up your Substance Painter project correctly
In Substance Painter:
- File → New
- Select your exported FBX/OBJ
- Template: PBR - Metallic Roughness
- Document Resolution: start at 2048, move to 4096 only if needed
If you’re doing product visualization
- 2K is fine for most portfolio work
- 4K is worth it for close-up shots
- 8K is rarely necessary and slows everything down
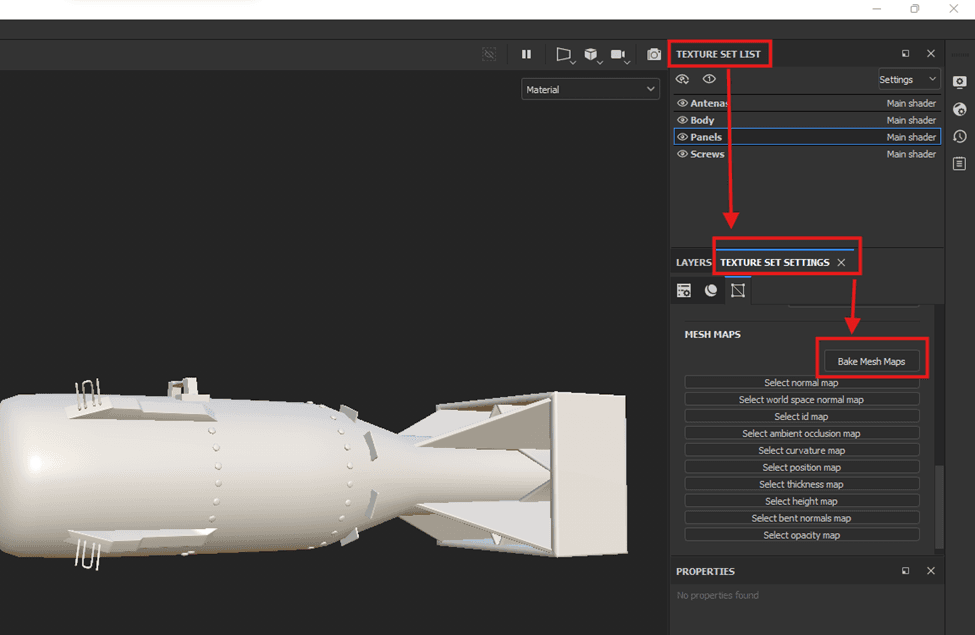
Step 4: Bake mesh maps (don’t skip this)
Even if you’re not using fancy smart materials, bakes are what make Painter “feel right”.
Go to:
- Texture Set Settings → Bake Mesh Maps
Recommended bake outputs:
- Normal
- World Space Normal
- Curvature
- Ambient Occlusion
- Thickness (optional)
- Position (optional)
Practical bake settings
- Output Size: same as your texture resolution (2K or 4K)
- Anti-aliasing: 2x or 4x
- Max Frontal Distance: small value (depends on scale)
- Max Rear Distance: small value
Pro tip: If you see bake artifacts, your mesh is usually the problem, not Painter.
Step 5: Texture as usual, but keep it physically believable
This is where a lot of people accidentally create “unreal” materials.
A good PBR rule:
- Don’t make roughness too clean unless it’s polished metal or glass
- Avoid pure black or pure white in Base Color
- Use subtle roughness variation even on plastic
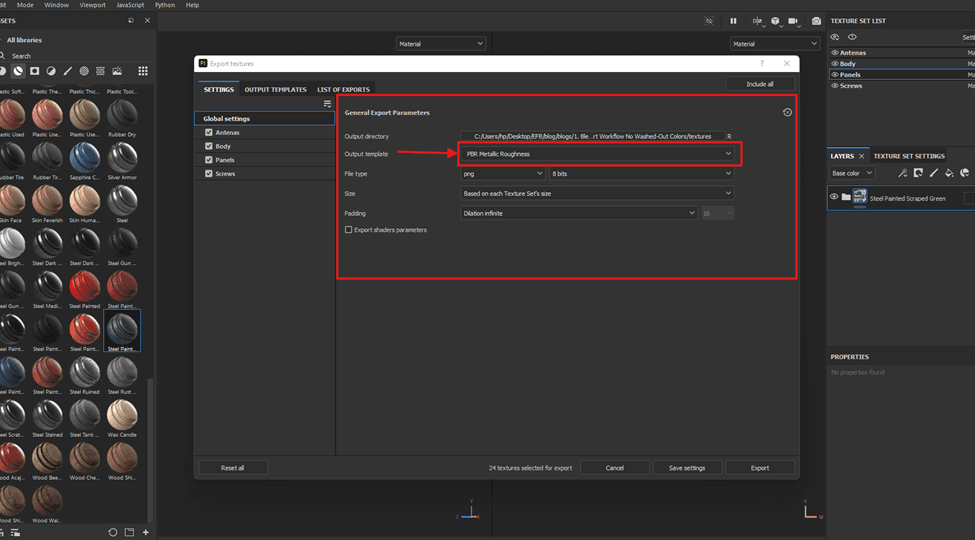
Step 6: Export textures using a Blender-friendly preset
This is where most people accidentally destroy their workflow.
In Substance Painter:
- File → Export Textures
Use:
- Output Template: Blender (Principled BSDF)
(If you don’t see it, use “PBR Metallic Roughness” and manually connect.)
Recommended outputs:
- Base Color
- Roughness
- Metallic
- Normal (OpenGL)
- AO (optional)
- Emissive (if used)
File type
- PNG for simplicity
- EXR only if you’re doing special HDR masks or advanced compositing
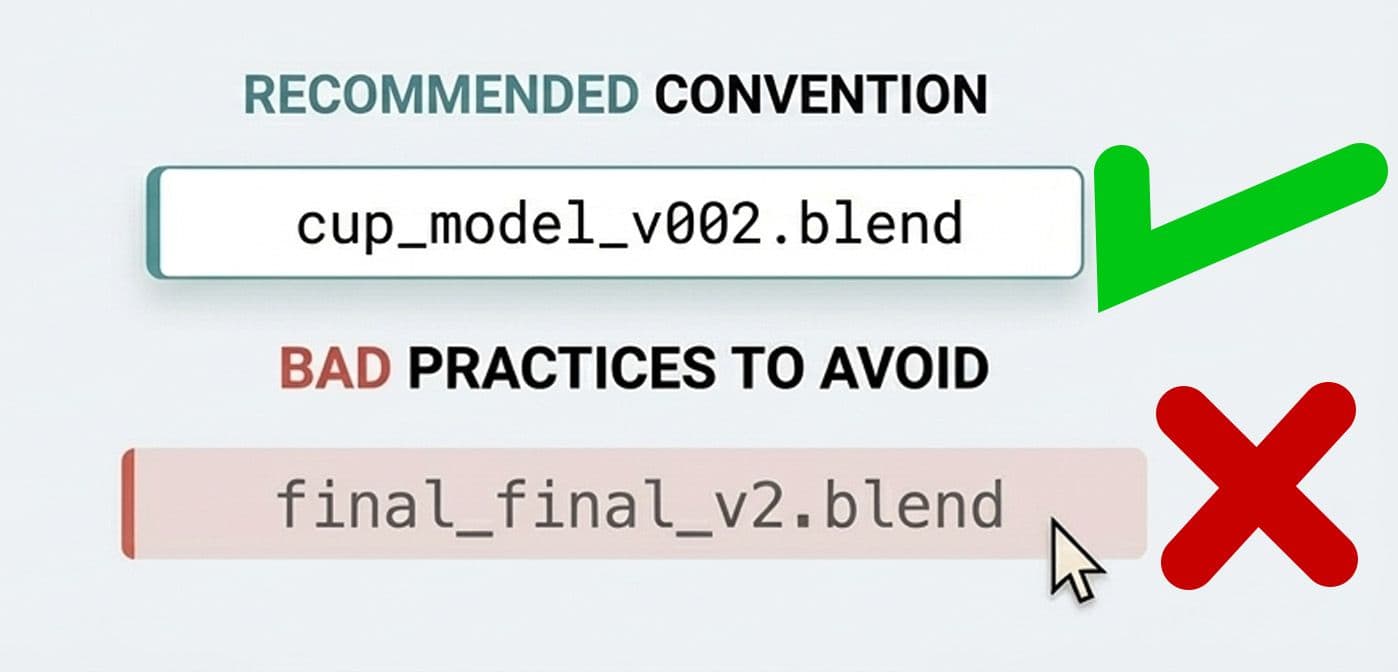
Naming convention (recommended)
- assetname_BaseColor.png
- assetname_Roughness.png
- assetname_Metallic.png
- assetname_Normal.png
- assetname_AO.png
This will save you a ridiculous amount of time later.
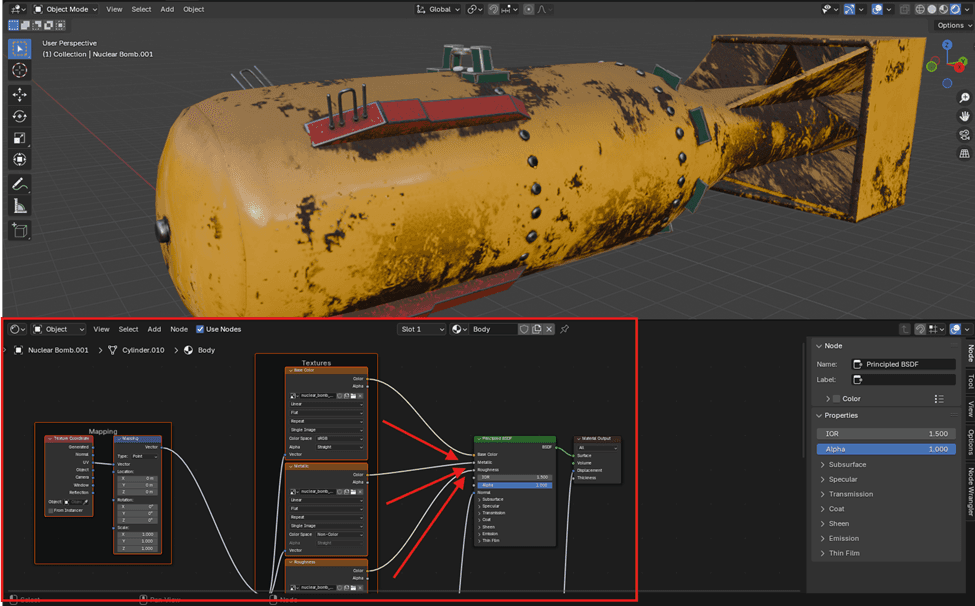
Step 7: Import into Blender and build the material correctly
In Blender, create a new material and use the Principled BSDF.
Here’s the correct hookup:
Base Color
- Image Texture → sRGB
- Connect to Base Color
Roughness
- Image Texture → Non-Color
- Connect to Roughness
Metallic
- Image Texture → Non-Color
- Connect to Metallic
Normal
- Image Texture → Non-Color
- Plug into Normal Map node
- Normal Map node → Principled Normal input
Normal Map node setting
- Space: Tangent
- Strength: start at 1.0
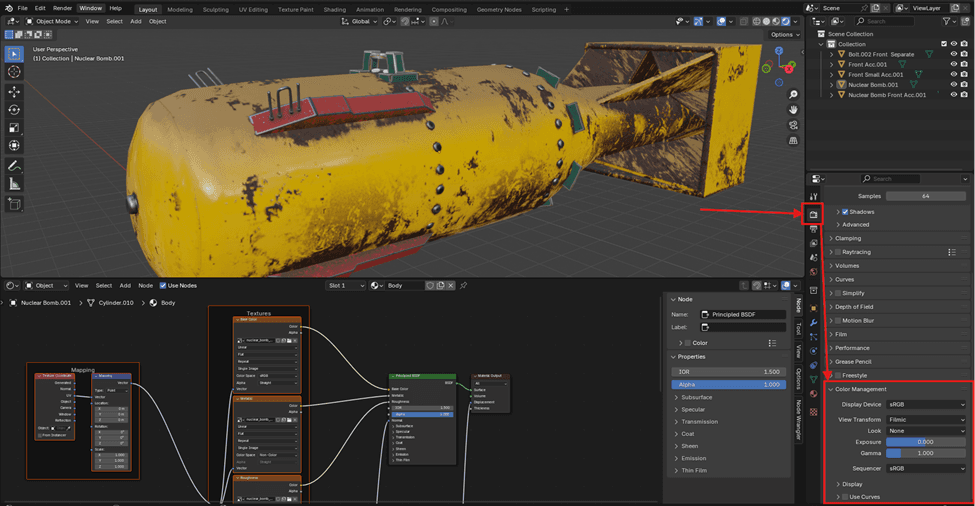
Step 8: Fix the #1 cause of washed-out colors (Color Management)
If your Blender render looks faded compared to Painter, it’s usually not the textures.
It’s Blender’s view transform.
Go to:
- Render Properties → Color Management
Recommended for consistency:
- View Transform: Filmic
- Look: None
- Exposure: 0
- Gamma: 1
Important reality check:
Painter’s viewport and Blender’s Filmic won’t look identical, because they’re not the same renderer.
But they should look “correct” and believable.
Common mistakes (and how to fix them)
Here are the most common reasons your Painter export looks broken in Blender:
- Roughness map looks glossy
- Fix: Make sure Roughness is set to Non-Color in Blender
- Normal map looks inverted
- Fix: Ensure Painter exported OpenGL normal maps, not DirectX
- Everything looks flat and dead
- Fix: You probably forgot to use an HDRI or proper lighting in Blender
- Base Color looks washed out
- Fix: Check Blender Color Management and make sure Base Color is sRGB
- Metal looks like plastic
- Fix: Metallic must be Non-Color, and your lighting needs reflections
Mini scenario: product visualization workflow that won’t embarrass you
Let’s say you’re rendering a smartwatch, headphones, or a skincare bottle for a portfolio or a client.
A safe workflow is:
- Texture in Painter using a neutral HDRI
- Export with Blender Principled preset
- In Blender, light with a studio HDRI + 1–2 area lights
- Render in Cycles with denoise (OIDN) and keep the roughness realistic
If you want your Substance Painter materials to look right in Blender, the trick isn’t “better textures”. It’s consistency: correct export presets, correct color space settings, and a clean Principled BSDF setup.
Once you save a Blender material template and a Painter export preset, this becomes a fast, repeatable pipeline you can use for almost any product viz or hard-surface project.
If you want a next step: build a small “shader test scene” in Blender with a studio HDRI and reuse it for every asset you texture.
About the Author: EFB Media
EFB Media is a 3D artist and content creator specializing in Blender workflows, product visualization, and realistic rendering. With years of experience creating digital art, they share insights and tutorials to help other artists master their craft.